

b. Chats and Messaging
When starting Teamwire, the ![]() Chats tab is shown by default. It shows all chats you are involved in.
Chats tab is shown by default. It shows all chats you are involved in.
As you receive new messages, you will find a badge counter on the Chats tab showing the number of unread chats. The respective chat which received new messages will have a badge showing the number of unread messages. Inside the chat, new messages are visually indicated from already read content by a separator.
Inbox
Your inbox provides four tabs which allow you to switch between the most important chat type criteria.
- All
The default tab which will show you read and unread, favourite and non-favourite, 1:1 and group chats or broadcasts alike. Archived chats are not shown.
- Favourites
This tab lists all your favourite chats.
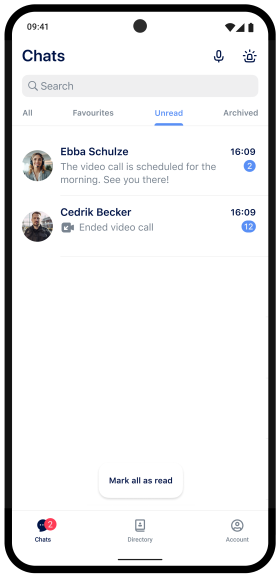
- Unread
This tab lists all chats with new messages and chats you have marked as unread.
- Archived
This tab lists all your archived chats.

Search
Tap ![]() in the upper-right corner of the screen to open a search bar. The search will look up for chat titles, contacts, lists and circles, bots, and message content. To leave the search, tap the arrow at the upper-left.
in the upper-right corner of the screen to open a search bar. The search will look up for chat titles, contacts, lists and circles, bots, and message content. To leave the search, tap the arrow at the upper-left.
Create a chat
To create a new chat, use the button ![]() in the lower-right corner of the screen, where you can then choose from the following options.
in the lower-right corner of the screen, where you can then choose from the following options.
1:1 chat
Select a participant. You will enter the new chat automatically and will be able to compose your first message. For 1:1 Chats Teamwire will show the name of the user you are talking to as title. Read here to find out which chat content and actions can be used.
If you want to have topic-based 1:1 chats, use the option Group Chat when creating the chat. It is possible to create a group chat with only one other user (see Group Chat).
Group chat
Select one or more participants, set a chat title and define further settings. You will enter the new chat automatically and will be able to compose your first message.
More information about chat content and actions are available here.
Broadcast chat
A broadcast chat is a group chat with the broadcast mode enabled. This mode is very useful for sharing announcements or briefings in your organisation.
Select one or more participants, set a chat title and define further settings. You will enter the new chat automatically and will be able to compose your first message.
More information about the broadcast chat mode here.
Federated chat
Federated chats allow communicating with users from other Teamwire Servers.
Select one or more participants, set a chat title and define further settings. You will enter the new chat automatically and will be able to compose your first message.
Available contacts
The availability of chat participants is limited to contacts and circles that have been enabled for federated usage. Therefore, you cannot create a chat from your organisation's federated and non-federated contacts. In case an important user is not available in your contacts when creating a federated chat, please approach your Teamwire admin.
Currently, it is not possible to add more chat members to the chat later.
Available chat content
The range of chat content is limited.
Currently, the following attachment types are supported: photos, (gallery), videos (gallery), files, attention messages and locations.
Removed federations
If the federation with one or more Teamwire Servers is ended, federated chats are automatically closed. The participants cannot send new content. Unlike closed chats, the chat history remains available for all members and can still be read.
Select participants
Select one or more users from your list of contacts by tapping the checkbox next to the user's name.
Already selected contacts are indicated with an ![]() and can be deselected by re-tapping.
and can be deselected by re-tapping.
You can combine contacts, lists, circles, and bots as chat members. Above the list of contacts, you will see an overview of all selected recipients and also be able to remove them from there.
Please note the maximum of members that can be added to a chat, which will be shown above the overview (Members X / 500) during the creation. The default maximum for a chat is 500 members, but it may have been adjusted by your Teamwire administrator.
Your contacts are split into four types and are listed per section.
Although all contacts are arranged in alphabetical order (by their last name), in a large organisation it can become challenging to find the right user quickly. Therefore, make use of the ![]() search bar, to find your contacts, lists, circles and bots per section.
search bar, to find your contacts, lists, circles and bots per section.


Define title
Set a title for your conversation. This title is not final and can be changed at any time via Chat Settings. For group chats, setting a title is mandatory.
Define further settings
- Allow to mute notifications
Decide whether chat members are allowed to mute this conversation so they will no longer receive push notifications.
- Alert Chat
This feature is meant for emergencies. An alert chat will always stay on top of its members inbox until its messages has been read. Beside alert chats, you can also create alert messages. More information about alert messages are available at the Attention messages chapter.
After defining all further settings, tap Create to enter the new chat automatically, and you will be able to compose your first message.
Voice and video calls
You can contact one or multiple users in your existing chats via voice or video call.
This feature is available for 1:1 chats and group chats.
There can only be one call in progress per chat. In case other participants are already having a call in the same chat, you will receive a notice.
Start a call
Open an existing chat or create a new chat with your favoured participants.
Start the call by tapping the respective button in the upper-right corner of the screen.
Use ![]() to start a voice call and
to start a voice call and ![]() to start a video call. You may enable your camera at any time during the voice call and turn it into a video call. You may disable your camera at any time of the video call, too.
to start a video call. You may enable your camera at any time during the voice call and turn it into a video call. You may disable your camera at any time of the video call, too.
The other call participants will be notified, even if they are currently not actively using the Teamwire app.
The number of participants for group calls is limited and given by your Teamwire server admin.
If your group chat has more participants than the number of members allowed in a group call, the icons will change a bit into ![]() for voice and
for voice and ![]() for video calls. Before the call can begin, you will be shown the list of all chat members from which you have to select one or more users (up to the max. number of call members) for the call.
for video calls. Before the call can begin, you will be shown the list of all chat members from which you have to select one or more users (up to the max. number of call members) for the call.


Join a call
If you have missed a call, you can also join it later.
Open the chat you were invited into to participate in the voice or video call. If the call is still ongoing, tap Join to access the call.

Features during a call
The following primary features are available during the call.
- Enable / disable microphone
- Enable / disable camera
- Select sound device
- Screen sharing
- Raise hand
- Toggle between front and backside camera
Emergency alert
This feature is meant for emergencies, allowing you to quickly create a new chat with a selected group of contacts, including an alert, a voice message (which you will record), and your current location.
The emergency alert won't ask for a chat title or additional settings. Alerts use a distinct notification sound in contrast to regular chat messages to captivate the attention of its recipients. Alerts stay on top of their inbox until they react to the message. In addition, alerts can bypass the silent mode of the other chat members, if they have granted the respective permission to Teamwire.

Usage
Tap the ![]() Emergency icon at the top of your inbox to open the screen.
Emergency icon at the top of your inbox to open the screen.
Select one of your circles or lists in the Send to section. If you have predefined a Default circle, you can skip this step, or change the selected circle or list.
You have two options for recording your voice message, which will be sent together with an alert and your current location.
- Tap the
 Record button once to start recording a voice message (of 30 seconds) without keeping your device at hand. You will see a respective countdown.
- After 30 seconds, the alert will be sent automatically, including your voice message and your location.
- Cancel your recording during the countdown by tapping the record button again (X).
- Tap and hold the Record button to record a voice message for as long as you want to.
- Release the button to send the alert, including your voice message and your location.
- Swipe up to cancel the recording and the process.
Default circle
Define a default group of contacts (in the form of a circle or list) to avoid selecting the recipients manually every time you use the emergency alert. Go to Account > App settings > Emergency alerts and select a circle or list from your directory.
Despite configuring a Default circle, you can still edit the Send to section, if you'd like to, before starting to record your message.
If your device is managed by a mobile device management, your Teamwire administrator may have already set a Default Circle, which you will not be able to change.
Push-to-Talk
This feature turns your Teamwire app into a walkie-talkie by sending voice messages directly to your Push-to-Talk chats and listening to the voice messages you receive.
Setup
In you inbox, use the ![]() icon in the upper-right corner to open the Push-to-Talk selection menu. Enable the Push-to-Talk ability for all chats required.
icon in the upper-right corner to open the Push-to-Talk selection menu. Enable the Push-to-Talk ability for all chats required.
As soon as you have defined at least one Push-to-Talk chat, you can decide via ![]() whether new messages received in your active channel will be played via speaker or if they are muted.
whether new messages received in your active channel will be played via speaker or if they are muted.
Use ![]() to remove your current selection of chats.
to remove your current selection of chats.


Usage
Your Push-to-Talk chats are displayed at the bottom of the inbox. Simply swipe to switch between your Push-to-Talk chats.
Tap and hold the button for as long as you want to record your message. As soon as you let go of the button, your message will be shared. The maximum duration of a voice message is 180 seconds.
Attachments
In addition to texts and emojis, you can send various attachments via Teamwire. If you want to attach a photo, appointment, or the like to your current conversation, choose one of the following options.
![]() Take photo
Take photo
Grant access to your camera to take and send photos or videos. Video recording is limited to 180 seconds.
![]() Photos and images from gallery
Photos and images from gallery
Grant access to your gallery to send photos and videos stored on your device.
![]() Record voice message
Record voice message
Grant access to your microphone to record and send a voice message. Voice recording is limited to 180 seconds.
![]() Further attachments and features
Further attachments and features
You will be listed further options for sharing content.
 Alert,
  Announcement or
  Note
Note
These are so-called attention messages. More information about attention messages are available here.
 File
File
Select any further file type via your file manager to share them (e.g. PDF, text file, presentation etc.).
 Location
If Teamwire has been granted access to your location data and GPS is enabled, you can send your current position or a POI to the chat.
You can also choose to share your live location with the chat members. More information about the live location feature are available here.
 Calendar
Grant access to your calendar to select appointments from your calendar app and attach them.
 Poll
Poll
Create a poll (interactive attachment) with up to five options and let your chat members vote to make decisions more quickly.
 Dracoon
This option is available if you have the Dracoon app installed. Select Dracoon and log in to your Dracoon user account to grant access to Teamwire. When sharing a Dracoon file in a chat, instead of sending the media itself, a link to the Dracoon exchange server is automatically generated. The chat participants can click on the link to view and download the file.


Mentions
Mention other chat members by typing an @-symbol.
You can mention single users, multiple users, or use @All to include all members of your conversation. Continue typing a colleagues name after the @ to limit the selection of available user mentions.

When mentioned, you will receive a push notification and the respective chat will dispaly the mention with an @-symbol in your inbox.

When selecting a chat where you have been mentioned, you will see the number of mentions. Tap the @-button to jump directly to the mention(s).

Attention messages
Via ![]() next to the text input field, various attention message types are available in Teamwire.
next to the text input field, various attention message types are available in Teamwire.
Chat members can respond to your status messages with a predefined selection of reactions without disrupting the flow of an active conversation. Reactions can also be sent by members of a broadcast chat.
- Alert
Label your message as an alert (text input turns red). Alerts cause a special ringtone and will create a different icon on the notification screen for its participants. A chat containing an alert message will be visually highlighted in its participants inbox, and will always stay on top until all new content has been read. The alert notification sound can be configured via Account > App settings > Notifications.
- Announcement
Label your message as an announcement (text input turns green). Chat members can react to your message via with a range of reactions.
- Note
Label your message as an note (text input turns yellow). Chat members can react to your message via with a range of reactions.
All message types above can be removed before sending by tapping the respective option again. Your message will be sent as normal text then.
Activity / Reactions
You can view the reactions to one of your attention messages via the ![]() report.
report.
You can find a chronological list of all reactions to your attention messages via the icon ![]() in the upper-right corner of the chat.
in the upper-right corner of the chat.
Live location
This feature allows other users to track your current location live on a map.
To share your live location, tap ![]() next to the text input field, select
next to the text input field, select ![]() Location and
Location and ![]() Share your live location.
Share your live location.
Open the live map and check your current position by tapping on the map preview in the chat.

Sharing duration
As you start the live location feature, you can select for how long you want to share it.
The remaining minutes / hours of the duration are shown in the chat and map view.
The app will automatically stop sharing when the duration has been exceeded without further notification.
Stop sharing manually
If you want to cancel sharing your live location before the selected duration, you can do so in the chat or map view by tapping Stop sharing.
Multiple users sharing
In one chat, multiple users can share their live location at the same time. Their locations will be shown in a single map.
A list of all chat members currently sharing their location is available in the bottom of the screen (expand).
Additional features
The live map offers different tools and settings to view users and map material.
- Focus user
Tap on one of the users to focus on them. This way, the user will always remain in the center of the map view. You can also select the user from the list of all chat members currently sharing their location.
 Center map
Tap on the symbol to center the view on your current location.
 Regroup
When you tap on this symbol, Teamwire automatically zooms out until all currently shared locations fit on one map view. Users that are close to each other will be grouped together.
 Draw on map
Tap on the symbol to draw an area on the map.
 Map settings
Tap on the symbol to open the map settings.
- Map type
Select from one of the available map types (Standard, Satellite, Hybrid). If your Teamwire administrator has enabled using ArcGIS Maps, the default maps will be replaced by ArcGIS Maps and you will receive a list of available map types. More information about enabling ArcGIS Maps in the Teamwire Dashboard are available here.
- Show user names
If enabled, in addition to the user photos, their names will be displayed on the map, too.
- Show user role
If enabled, in addition to the user photos, their role will be displayed on the map, too (the information is taken from the user's profile).
- Group users
Enabled by default. Users who are in close proximity to each other are grouped together.
- Map type
Draw on map
This feature allows you to manually draw areas on the maps of shared locations and label them.


Draw area
Before sharing your location or live location, tap ![]() in the upper-right corner of the map. Draw an area on the available map view with your finger. When you are finished, this area will be highlighted and a dialog box will open. There you have the possibility to define a label for the area (optional), e.g. "Festival area", "Search radius" or "Living street".
in the upper-right corner of the map. Draw an area on the available map view with your finger. When you are finished, this area will be highlighted and a dialog box will open. There you have the possibility to define a label for the area (optional), e.g. "Festival area", "Search radius" or "Living street".
Tap Redraw area to draw the area anew.
Tap Done to save the area and share it with other chat participants.
Tap X to end the process and discard the area you've drawn.
Remove area
Tap on your area in the map view to open the dialog box and select Remove area to delete it.
You can only remove those areas which you have drawn yourself.
Area labels
After drawing an area, a dialog box will open and prompting you to add a label.
Labels are optional. Leave the text input field empty, if you do not want to add a label.
You can edit or remove an area label at a later time. To do so, tap on your area in the map view to open the dialog box and edit / remove the text from the input field.
Tap X to end the process and discard your changes.
You can only edit / remove labels for those areas which you have drawn yourself.
Multiple user areas
Since multiple live locations can be shared on one map at the same time, all the areas drawn by the chat participants and their labels will appear, too.
If the areas of one or more users overlap, the labels appear as a single pin. Zoom into the map to be able to read the individual labels of the respective areas.
You cannot edit / remove areas and labels of other chat participants.

Message actions
When you're in the chat view, you have different actions, which you can perform on your and other chat member's sent messages and attachments.
Reply
Tap and hold the respective message or attachment to open the actions menu.
Select ![]() Reply to add a quote of the original message when sending your answer. This is especially useful in chats with numerous users and mixed conversations. Replies help you and others to remember the context of messages.
Reply to add a quote of the original message when sending your answer. This is especially useful in chats with numerous users and mixed conversations. Replies help you and others to remember the context of messages.
Forward
Tap and hold the respective message or attachment to open the actions menu.
Select ![]() Forward to see a list of existing chats which you can forward the content to. If you want to forward a message to a user, list, or circle who you don't yet have a chat with, tap
Forward to see a list of existing chats which you can forward the content to. If you want to forward a message to a user, list, or circle who you don't yet have a chat with, tap ![]() New chat in the bottom-right corner of the screen and continue selecting your participants.
New chat in the bottom-right corner of the screen and continue selecting your participants.
Copy
Tap and hold the respective message to open the actions menu.
Select ![]() Copy to copy the message content to your clipboard. You can paste the text to another chat or an external app.
Copy to copy the message content to your clipboard. You can paste the text to another chat or an external app.
Pin
By pinning messages, you can make important or frequently needed information easily accessible and save chat participants the time to search for it.
 Tap and hold the desired message to open the action menu.
Select ![]() Pin and the message will be pinned to the top of the chat, visible to all members, in the pin bar.
Pin and the message will be pinned to the top of the chat, visible to all members, in the pin bar.
To remove a pinned message, tap and hold the respective message in the pin bar to open the actions menu, and select ![]() Unpin.
Unpin.
Delete
You can delete your own messages and attachments in Teamwire, even if they have already been read by others.
Tap and hold the respective message or attachment to open the actions menu.
Select ![]() Delete to remove it permanently.
Delete to remove it permanently.
Chat actions
These are actions that can be performed on your existing chats.
Mark as read / unread
Mark a chat as read, if you don't want to read new messages intentionally. The other chat members will still receive your read receipt.
You have multiple options to perform the ![]() Mark as read action on a chat.
Mark as read action on a chat.
- In your inbox, swipe right on the chat you want to mark as read and select the action.
- In your inbox, tap and hold down on the chat you want to mark as read to open the actions menu.
Mark a chat as unread, after you open it, either intentionally or accidentally. This can help you to remember you coming back to the conversation at a later point of time. This action will also show the chat in the Unread tab in your inbox.
You have multiple options to perform the ![]() Mark as unread action on a chat.
Mark as unread action on a chat.
- In your inbox, swipe right on the chat you want to mark as unread and select the action.
- In your inbox, tap and hold down on the chat you want to mark as unread to open the actions menu.
Mark all as read
In addition to marking individual chats as read, you can manage all unread messages centrally.
In your inbox, open the Unread tab. You will find all chats with new messages, and chats you have manually marked as unread.
If you have unread messages, you will finde the button Mark all as read to clear the list in one easy step.

Pin
This is a personal setting and will only affect your own chats and inbox.
Pinned chats stay on top of your inbox, even if other chats have newer messages.
You have multiple options to ![]() Pin a chat.
Pin a chat.
- In your inbox, swipe right on the chat you want to pin and select the action.
- In your inbox, tap and hold down on the chat you want to pin to open the actions menu.
- Open the chat and go to its Chat settings to select the action.
In the same way, you can ![]() Unpin a chat again.
Unpin a chat again.
Favourite
This is a personal setting and will only affect your own chats and inbox.
Favourite chats are additionally shown in the Favourites tab in your inbox. This feature helps you find your favourite conversations faster. Especially when forwarding messages or attachments, as your Favourites will be shown first in the list of available chats.
You have multiple options to ![]() Favourite a chat.
Favourite a chat.
- In your inbox, swipe right on the chat you want to favourite and select the action.
- In your inbox, tap and hold down on the chat you want to favourite to open the actions menu.
- Open the chat and go to its Chat settings to select the action.
In the same way, you can ![]() Unfavourite a chat again.
Unfavourite a chat again.
Mute
This is a personal setting and will only affect your own chats and inbox.
Muted chats will no longer notify you about new messages via sound, vibration or push notification. This applies only per muted chat. The app badge on your home screen will include muted chats when showing the number of unread conversations.
You have multiple options to ![]() Mute a chat.
Mute a chat.
- In your inbox, swipe left on the chat you want to mute and select the action.
- In your inbox, tap and hold down on the chat you want to mute to open the actions menu.
- Open the chat and go to its Chat settings to select the action.
In the same way, you can ![]() Unmute a chat to receive its notifications again.
Unmute a chat to receive its notifications again.


Archive
This is a personal setting and will only affect your own chats and inbox.
You can archive a chats if it's no longer active or when a topic-based discussion is completed. Archived chats are not displayed in your regular All tab and are moved to the Archived tab in your inbox.
You have multiple options to ![]() Archive a chat.
Archive a chat.
- In your inbox, swipe left on the chat you want to archive and select the action.
- In your inbox, tap and hold down on the chat you want to archive to open the actions menu.
- Open the chat and go to its Chat settings to select the action.
In the same way, you can ![]() Unarchive a chat from the Archived tab.
Unarchive a chat from the Archived tab.
Leave
You may leave a chat if you no longer want to be part of the conversation, or your participation is no longer required.
You have multiple options to ![]() Leave a chat.
Leave a chat.
- In your inbox, swipe left on the chat you want to leave and select the action.
- In your inbox, tap and hold down on the chat you want to leave to open the actions menu.
- Open the chat and go to its Chat settings to select the action.
To rejoin a chat, one of the chat admins can add you again.
Close
This is an administrative setting and will affect all members of the chat.
Only chat administrators can close a chat.
Close a chat when the conversation is over and no longer needed. After a chat has been closed, the conversation can no longer be read by its members.
You have multiple options to ![]() Close a chat.
Close a chat.
- In your inbox, swipe left on the chat you want to close and select the action.
- In your inbox, tap and hold down on the chat you want to close to open the actions menu.
- Open the chat and go to its Chat settings to select the action.
If you are a chat admin, you can ![]() Reopen the chat in the same way.
Reopen the chat in the same way.


Email chat history
Open the Chat settings of the conversation you want to share. Select ![]() Email Chat History to transfer the conversation in plain text to your default mail app.
Email Chat History to transfer the conversation in plain text to your default mail app.
Please note that attachments cannot be transferred to the mail.
Chat settings
Open a chat and tap its chat title at the top to open the chat settings. Among other things, here you can edit the title or add more users to the conversation.

Avatar
Tap on the current chat avatar. You can choose an existing picture of your photos and images from your ![]() Gallery or take a photo with your
Gallery or take a photo with your ![]() Camera. The new avatar will be shown to all members of the conversation.
Camera. The new avatar will be shown to all members of the conversation.
Tap the avatar again to change or remove the image.
Title
Tap on the text below the chat avatar to edit the chat title. Confirm your changes via Enter.
If you want to reset a chat title, remove the current text and confirm via Enter. The title will adopt the automatically generated name. But remember that defining a title is mandatory for group chats.
Mode
Teamwire supports two chat modes. Change the current mode by enabling or disabling the Allow to send messages feature.
- Normal
Allow to send messages enabled
By default, the chat settings suggest to create a conversation with the Normal chat mode enabled. This mode allows all members to compose and send messages / attachments to the chat.
- Broadcast
Allow to send messages disabled
The Broadcast mode will only allow chat administrators to compose and send messages / attachments to the chat. This mode is very useful for sharing announcements or briefings in your organisation.
Administrators
This section lists all ![]() administrators of the current chat.
administrators of the current chat.
Chat administrators can perfom advanced actions in a group chat:
- Manage chat members (add and remove)
- Manage chat administrators (promote and demote)
- Delete any message and attachment
- Close the chat
- Edit the chat title
- Edit the chat mode
- Edit the "Mute chat" permission (allow and disallow)
In a 1:1 chat, both members become chat administrator by default.
In a group chat, the creator of the chat is automatically promoted to chat administrator. This applies to all ways of group chats; whether the chat was created by selecting several individual users, by adding circles or lists, or by a mix of all options mentioned.
Promote to chat admin
In the chat settings, tap ![]() Members to see a complete list of the current chat's participants. If the chat was created via circle, tap on its name to view the list of members. Tap and hold down on the user of concern, then select Make chat admin.
Members to see a complete list of the current chat's participants. If the chat was created via circle, tap on its name to view the list of members. Tap and hold down on the user of concern, then select Make chat admin.
Demote chat admin
In the chat settings, tap ![]() Admins to see the list of the current chat's admins. Tap and hold down on the user of concern, then select Remove to demote them.
Admins to see the list of the current chat's admins. Tap and hold down on the user of concern, then select Remove to demote them.
Chat admins can only remove the privileges of another chat admin, but not their own.
Members
This section lists all ![]() members of the current chat incl. chat administrators.
members of the current chat incl. chat administrators.
If the chat was created by adding a circle, its name will be shown. The members of the circle can be viewed by tapping the circle name and selecting View members.
Add members
Tap the uppermost option ![]() Add a Colleague to this Chat above the list of chat members. You will be forwarded to your directory from which you can add further users and/or circles and lists. Confirm your selection by tapping Done.
Add a Colleague to this Chat above the list of chat members. You will be forwarded to your directory from which you can add further users and/or circles and lists. Confirm your selection by tapping Done.
Remove members
To remove a user from the chat, tap and hold down on their name in the list of chat members, then select Remove from chat. You cannot remove individual users which have been added via circle. You have to remove the complete circle from the chat instead.
Read receipts
The read receipts of chat members are represented by their user avatars and can be found at the bottom of the conversation. Please note, that these read receipts only apply to the latest message of the chat and cannot be viewed for previous messages.
If you are looking for a detailed view of the current read receipts, tap the line of user avatars to receive a complete list of members.
Media overview
Below the chat settings you will find the Media overview, which allows you to look up for all attachments and attention messages that have been shared in the current chat. The media is filtered by its file type.